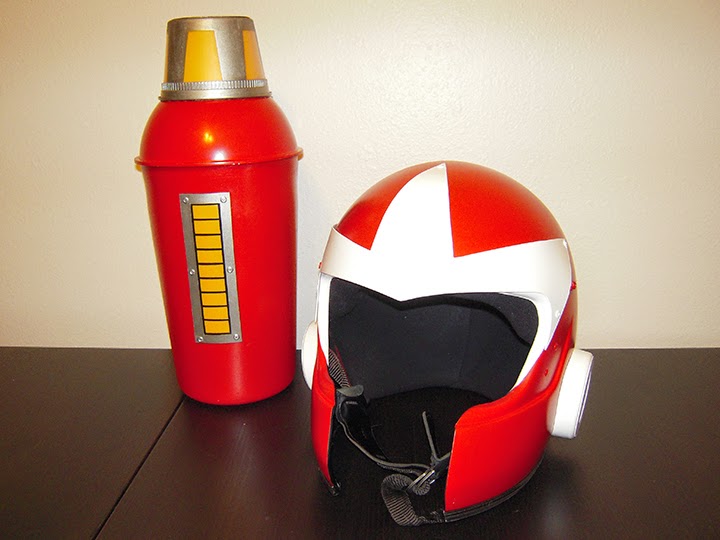
Above are a few pictures of my finished Proto Man costume (yes, I am missing the shield). This costume turned into a bigger project than I anticipated, and time became an issue leading up to Halloween. With that being said, I'm still happy with how this costume turned out. I'll probably wear this costume again at Comic Con, and at that time I'll complete the shield, and make other improvements.
I found this dirt bike helmet at a thrift store for $4. Originally I was looking for something that I could make into a Mega Man helmet. However, once I saw the red helmet Proto Man seemed like a much cooler option.
I removed the visor and created the white shape of Proto Man's helmet with masking tape. This allowed me to get the shape to look correct. I then removed the masking taped and used it as a template to trace the shape onto a thin sheet of plastic.
Above is the white plastic element added to the helmet. I painted it white and pop-riveted it into place. Getting it straight and symmetrical without it binding took patience and time. I also used a Dremel cutting wheel to remove the mouth area of the helmet.
The completed Proto Man helmet. The white circle "ears" were perhaps the most difficult part of the entire helmet. They are made from cupcake sprinkle containers from Target. Getting them to rest flush against the curve of the helmet was a long process of trial and error. After multiple tries I finally made a perfect one. I then had to mirror the shape for the opposite side. To complete the helmet I wear black safety sunglasses.
These Rubbermaid 1 gallon pitchers would ultimately make up my cannon and armor for my forearms. I removed the handle and spout with a grinder and drilled a hole in the bottom using a hole saw bit. This plastic was not meant to be destroyed like this. It was another frustrating, and time consuming project.
I used various plastic dollar store bowls to complete the shapes for Proto Man's arms. I had to shorten the non-cannon forearm by a couple of inches so I could fully bend my elbow. I used a clear plastic container for the tip of the cannon. There is actually a flash light in the tip that lights the cannon up. The power bar on the cannon was made with the same thin plastic that was used on the helmet. It was also pop-riveted onto the cannon after some paint. The power bar also lights up.
Above are a couple pictures of the finished cannon. There is a handle inside the cannon (not pictured) that helps me hold the cannon into place. I'm really happy with how the cannon turned out.
I struggled with how to build the boots for Proto Man and I was running out of time. This was ultimately my solution. I used the same thin sheet of plastic from before, and rolled it into a tube. I used brad fasteners to hold the shape. I then added some foam padding to snug them to my calves, and I slid cut-off sweat pant legs over them. Not what I was hoping for, but ultimately it worked for the costume party. I completed the boot by wearing red slippers. If I use this costume again I'll revisit Proto Man's boots and hopefully end up with a better, improved solution.
A quick shot of my cannon lit up in the dark. The costume was a success! It turned into a much bigger project than I anticipated, but it was fun to work on. The helmet and cannon make a great display in my office/studio. I may wear this again at a Comic Con, but I need to make some improvements first and finish the shield.


